Which Neoprene Bag Seam Survives Stretch, Load and Repeated Opening?
Flatlock gives the flattest joint, blind stitch hides itself on a closing seam, double-needle carries the load, and binding closes a raw edge. Each needs its own needle, thread and stitch density, because too many perforations turn a foam panel into a tear line.
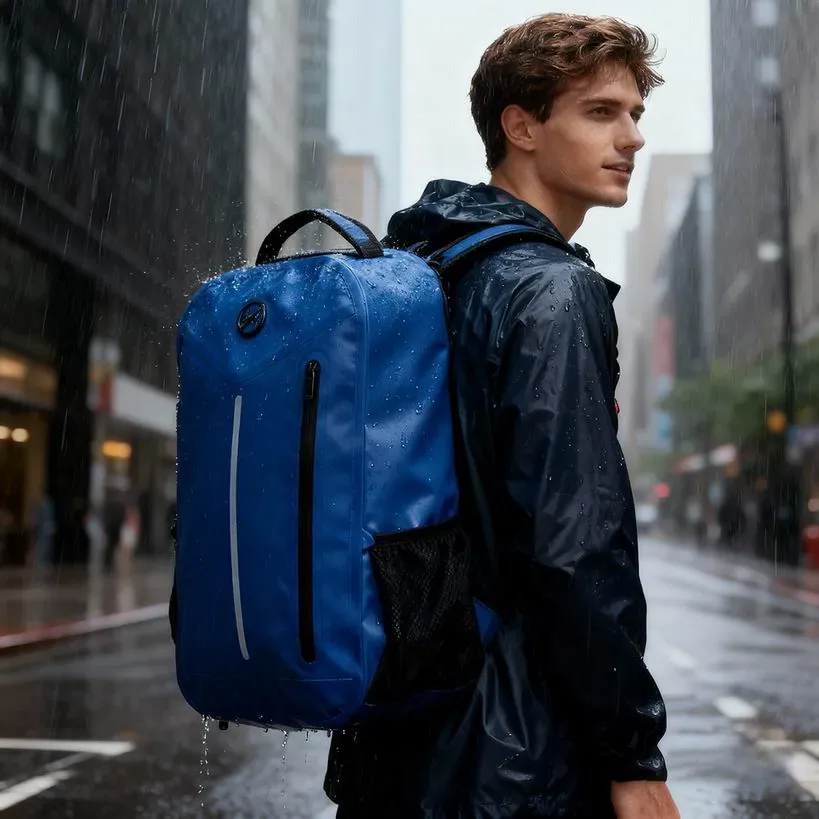
Four constructions carry neoprene: flatlock (butted then sewn flat with a cover stitch), blind stitch (hidden for a clean shell), double-needle topstitch (structural and visible), and overlock bound into a binding tape at the edge. Each differs in bulk, stretch and how it fails. A stretch face demands a seam that extends with it, which is why a stitch that is correct on a woven panel can be wrong on foam.
Seams decide more of a neoprene article than the panel does, and they are the least specified part of most tech packs. A bag is quoted at "3 mm neoprene, sewn", the sample looks fine because it was assembled slowly by an experienced operator, and the tenth hundred units show a seam that grins, a binding that has rolled, or a corner that has opened. This piece sets out the four constructions available on this material, what each one is good at, the needle and thread each needs, and how to write the choice so the reorder matches.
What Does a Neoprene Seam Have to Do That a Woven Seam Does Not?
Three things beyond holding the panels together. It has to extend with the face fabric, which can run fifty percent elongation in the filling direction, without popping stitches or puckering afterwards. It has to survive being compressed, because the seam sits at the point where the article folds and where a cushioning panel is doing most of its work. And it has to resist being perforated: every needle hole through a closed-cell sheet is a place where water can reach the core and where the foam is locally destroyed.
That third point drives everything practical. A stitch density that gives a strong, handsome seam on a woven fabric can turn a neoprene panel into a perforated tear-line waiting for a load. The practical consequence is a longer stitch, a finer needle than the thickness seems to demand, and a thread that is chosen for elongation rather than for breaking force alone.
| Construction | How it is built | Where it belongs | Bulk profile |
|---|---|---|---|
| Flatlock | Two edges butted or lapped, joined with a cover stitch that lies flat | Apparel-like panels, sleeves, anywhere bulk must be minimal | Lowest of the four |
| Blind stitch | Curved needle picks only part of the thickness, hidden on the face | Clean outer shells and closing seams on finished assemblies | Low; nothing shows on the face |
| Double-needle topstitch | Two parallel rows through overlapped panels | Load-bearing joins, strap anchors, structural tops | Highest; two visible rows |
| Overlock plus binding | Edge overlocked, then bound with a tape closed with a cover stitch | Raw edges, openings, rims that must not ravel | Moderate; the tape sits proud |
How Does Flatlock Differ From Butt-Seam Construction?
Flatlock is the workhorse on this material because it produces the flattest possible joint. The two edges are butted — or sometimes lightly lapped where the subsequent coverage matters more than the bulk — and a cover stitch bridges them with loops on both faces. Done well, the seam lies almost flush with the panel, which is what makes it the standard choice anywhere the article has to slide inside another one or rest against the body without a ridge.
It has a weakness worth knowing before it is drawn. Because the stitch bridges rather than overlaps, the joint relies on the thread for its strength; there is no lap of material sharing the load. On a panel that will carry weight, flatlock needs reinforcement — either a second row, a taped backing, or a structural topstitch elsewhere in the assembly that takes the load off the flat seam.
When Is Blind Stitch the Right Answer on a Closed Panel?
Blind stitch exists to hide itself. A curved needle enters the fold of the material and picks up only a few yarns of the face before returning, so nothing or almost nothing is visible on the outside. On neoprene it is used to close the final seam of an assembly that was sewn right-side-out: the panels are joined with the visible seams inside, the article is turned, and the remaining opening is closed invisibly.
The trade-off is that blind stitch is the weakest of the four by a wide margin, because the needle bites only a small amount of material. It is a closing seam, not a structural one, and using it anywhere that carries load is the most common cause of a bag opening in service. Specify it explicitly as a closing operation, and put the structural seams inside the assembly where they can be double-needle or flatlock.
What Does Double-Needle Topstitching Actually Add?
Strength and definition, in that order. Two parallel rows through an overlapped or turned edge create a much longer load path than a single row, and the double row resists the peeling action that opens a single-row seam. It also defines the edge visually, which is why it appears along openings and rims on articles that need to look finished rather than soft. The cost is bulk: two rows through a 3 mm laminate build a ridge that both shows and stiffens the edge.
Where it earns its place is at load points. A strap anchor, a handle root, the top edge of a panel that carries the weight of the contents — those are double-needle positions with a bar-tack at each end. Where it is wrong is anywhere the panel has to fold or roll, because two rows of thread through foam create a hinge line that will eventually crease permanently along the stitch.
Which Needle, Thread and Stitch Density Does Neoprene Need?
Start with the needle, because the wrong one does damage that no amount of re-sewing fixes. A ballpoint or light ballpoint point separates the yarns of the face fabric instead of cutting through them; a sharp point cuts and produces a run. Size follows gauge: a 70/10 or 75/11 for 1.5 to 2 mm, an 80/12 for 3 mm, and a 90/14 for 4 to 5 mm, with a fresh needle — a burred needle heats, melts the coating on some face fabrics, and drags on the next hundred parts.
Thread wants elongation more than it wants breaking force. A bonded polyester with a controlled stretch or a textured polyester with high extension resists popping under load better than a stiff, high-tenacity thread that cannot move with the panel. Stitch density should be lower than instinct suggests — commonly around six to eight stitches per twenty-five millimetres on a foam panel, against ten to twelve on a woven one — because every additional perforation weakens the line.
- Construction per seam
- Named individually: flatlock, blind stitch, double-needle, bound
- Needle
- Ballpoint or light ballpoint, size by gauge, replaced every stated number of hours
- Thread
- Polyester with specified elongation, stated ticket number and finish
- Stitch density
- Six to eight stitches per 25 mm on foam panels, stated
- Stitch type
- Named per ASTM D6193 classification
- Seam allowance
- Stated per seam, allowances differ between constructions
- Bar-tacks
- Position, width and length at every load point
- Seam strength
- Acceptance figure to ISO 13935-2, with sample size stated
- Appearance
- No perforation beyond a stated count per 100 mm under 3x magnification
- Reference seam
- A retained sewn swatch from the approved run
How Do Seams Fail on a Neoprene Article, and How Do You Spot It Early?
Five failures account for nearly everything. Grinning: the seam opens under light tension and shows the needle line, which is almost always too high a stitch density or too stiff a thread. Popping: individual stitches break under extension, usually because the seam could not extend with the face. Roll: the binding rotates to one side instead of sitting square on the edge, from a binding folded off-centre or an edge that was not trimmed square. Perforation tear: the seam line tears along its length because too many holes were punched through too small a section. And delamination at the seam, where the face fabric lifts from the foam under repeated flexing.
All five are visible in a simple stretch test at sampling: pull the seam across its line to the extension the face can reach and hold it. A seam that grins at that point will grin in service, and one that pops there will pop in the field. Do it on a production-made unit rather than a sample-room one, because the difference between the two is operator speed and needle condition, both of which affect perforation.
The same five appear in different proportions depending on the construction, which is useful when diagnosing a sample. Flatlock grins but rarely pops, because there is no overlap to concentrate load. Double-needle pops less often than it tears alongside, because the failure usually moves off the thread and into the foam. Blind stitch opens at the pick line, which reads like a seam failure but is really a construction misapplication — the seam was asked to do structural work it cannot do.
One more failure belongs on the list because it only appears late: the seam that is correct on the day and wrong after eight weeks. It is caused by the panel taking compression set while packed, so that a seam sewn flat on the bench is lying under residual strain by the time the carton is opened. It looks like grinning, it is diagnosed as a thread problem, and it is actually a packing-density problem that should have been answered with a supporting board or a looser carton.
Which Standards Test a Neoprene Seam, and What Is a Fair Acceptance Figure?
Seam construction is classified under ASTM D6193, which sets out stitch types and seam types and is the right vocabulary for specifying the joint. Seam strength of the assembled textile is measured to ISO 13935-2 by the grab method, giving the maximum force at rupture; fabric tensile behaviour alongside it comes from ISO 13934-1. Those three give a complete picture: what the seam is, how strong the assembly is, and how strong the panel around it is.
A fair acceptance figure is written after measurement rather than before. Build the intended seam on the intended panel, test five specimens, take the mean and set acceptance at eighty percent of the mean rather than at a figure borrowed from a woven-fabric specification. The reason is that a foam panel fails by tearing along the stitch line rather than by breaking thread, so the achievable figure is lower and the acceptance has to reflect what the construction can actually do.
| Failure mode | Visible symptom | Root cause | Corrective action in specification |
|---|---|---|---|
| Grinning | Seam opens and shows the needle line under light tension | Stitch density too high, thread too stiff | Lower density, move to a higher-elongation thread |
| Popping | Individual stitches break when the panel extends | Seam cannot extend with the face fabric | Change stitch class, or add elastic properties to the seam |
| Binding roll | Binding sits to one side of the edge | Folder off-centre, edge trimmed out of square | Trim square; set and check the binding folder |
| Perforation tear | The seam tears along its length | Too many perforations per unit length | Lower density, smaller needle, check needle condition |
| Seam delamination | Face fabric lifts from the foam at the join | Bond inadequate for the flex duty | Review the bonding method and its cure |
How Does Seam Choice Move Cost, Bulk and the Line?
The direct cost differences are modest; the indirect ones are not. A flatlock machine is a different asset from a double-needle machine, and a blind stitch machine is a specialised one, so each construction added to an article adds a station to the line and a handling step between stations. An article that uses three constructions is more expensive to assemble than one that uses two, for reasons that have nothing to do with thread.
Bulk is the other indirect cost, and on this material it compounds with gauge. The seam joint at 3 mm is four layers; add a binding and it is six. Every one of those layers has to be trimmed, folded and covered, and every additional layer makes the corner heavier. A designer who draws a 3 mm panel with a bound flatlock edge everywhere has specified a corner that is very difficult to make neat, and the honest fix is usually to reduce gauge at the edge rather than to buy a cleverer machine.
How Should the Seam Be Written Into the Tech Pack and the QC Plan?
Seam by seam, in a table, with the construction named rather than drawn. Each row names the join, its construction, its stitch class under ASTM D6193, its density, its needle and thread, and whether it is structural or cosmetic. Drawings alone leave latitude, and latitude is where a reorder drifts. The table also gives the merchandiser something to check against when a cost request comes back asking for a simpler seam.
Then translate the same table into defect classes for inspection. A structural seam that misses an intended stitch is a different class of problem from a cosmetic one with a slightly uneven line, and at AQL 2.5 under ISO 2859-1 General Inspection Level II the two are judged against different limits. Write grinning, popping, roll and missed stitches into the class list with the class against each, so the inspector is applying the buyer judgement rather than a personal one.
Programme arithmetic is unchanged: MOQ 500 pcs per style and colourway, sampling 6-10 working days from a signed-off tech pack, bulk production 35-50 days from sample approval, inspection at AQL 2.5 under ISO 2859-1 General Inspection Level II, T/T 30/70, quoted FOB Xiamen. What does move with seam choice is the sampling cycle, because an unusual construction may need a proof run on the right machine before a valid sample exists.
Specify the seam per joint, not for the whole bag
Send the drawing or the sample you want matched. You get a seam table with the construction, needle, thread and acceptance figure behind each join, within one business day.
Frequently Asked Questions
What is the strongest seam for neoprene?
A double-needle topstitch over an overlapped or turned edge carries the most load, with bar-tacks at both ends. Flatlock is flatter and weaker, because it relies on thread across a butt joint.
What is flatlock stitching?
A cover stitch bridging two butted edges so the joint lies almost flush with the panel. It is the standard choice where bulk must be minimal, and it needs reinforcement where the panel carries weight.
What is blind stitch used for?
Closing the final opening of an assembly sewn and turned so nothing shows on the face. It is the weakest construction and should never be specified at a load point.
Why do neoprene seams pop?
Because the seam cannot extend with the face fabric. It is usually a thread with insufficient elongation or too high a stitch density rather than a weak thread.
What stitch density should a neoprene seam use?
Commonly six to eight stitches per 25 mm on a foam panel, against ten to twelve on a woven fabric. Every perforation removes material from the joint.
What needle does neoprene need?
A ballpoint or light ballpoint that separates face-fabric yarns rather than cutting them, sized by gauge: 70/10 to 75/11 up to 2 mm, 80/12 at 3 mm, 90/14 at 4 to 5 mm.
Which standards apply to neoprene seams?
ASTM D6193 classifies stitch and seam types, ISO 13935-2 measures maximum force at seam rupture, and ISO 13934-1 gives the tensile behaviour of the fabric around the seam.
What is a fair seam strength figure?
Build the intended seam on the intended panel, test five specimens and set acceptance near eighty percent of the mean. Foam fails by tearing along the stitch line, so woven-fabric benchmarks do not transfer.
What is binding roll and why does it happen?
The binding tape rotates to one side of the edge instead of sitting square, usually because the folder was set off-centre or the panel edge was not trimmed square.
How should seams be classified for inspection?
Into structural and cosmetic joins, with grinning, popping, roll and missed stitches named in the defect class list and each judged at the appropriate AQL.
What is the MOQ for a neoprene sewn article?
MOQ 500 pcs per style and colourway, with repeat programmes open to discussion at 300 pcs.
Can a multi-construction design slow sampling?
Yes. Each added construction is another station on the line, and an unusual one may need a proof run on the correct machine before a valid sample exists.
People Also Ask
What seam is used for neoprene?
Flatlock for low bulk, double-needle for load, blind stitch to close an invisible opening, and binding at raw edges.
Why do stitches break on stretch fabric?
The thread or the stitch class cannot extend with the face fabric, so individual stitches pop under load.
How many stitches per inch should neoprene have?
Fewer than a woven panel: roughly six to eight per 25 mm, because each perforation weakens the foam along the joint.
What is the strongest way to join neoprene?
An overlapped join sewn with two parallel rows and bar-tacked at both ends, rather than a butt joint bridged by one row.
How do I stop a binding from rolling?
Trim the edge square, set the binding folder on centre, and check the roll on a production unit rather than on a sample-room one.
Sources and further reading
Every figure on this page is either our own programme data or attributed below. Open the originals before you write them into a specification.
- ASTM D6193 — Standard Practice for Stitches and SeamsASTM International
- ISO 13935-2 — Seam tensile properties: grab methodInternational Organization for Standardization
- ISO 2859-1:1999 Sampling procedures for inspection by attributesInternational Organization for Standardization